Glock Trigger Shoe Removal EDUCATIONAL ONLY
TRANSCRIPT | Video Link
Hey everyone. Johnny from Johnny Custom Glocks here.
I wanted to shoot a short video on, I know a lot of, there's a lot of trigger shoes that are just going around out there and I’ve had a lot of customers ask me to, you know, how do I get the, how do I get the Glock shoe off, you know, without messing up ton of stuff up in case I want to put it back on.
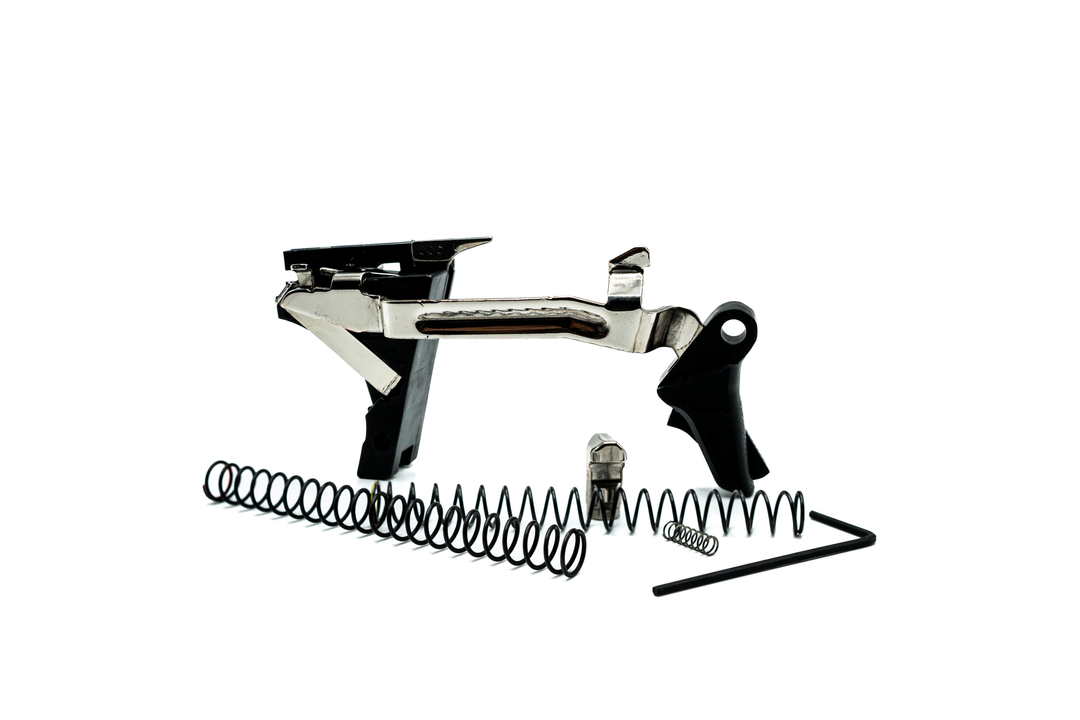
And so I'm going to shoot a video on that, first of all on my other video I was talking about connector geometry. I wanted to show you guys you know this little thing I built right here to show you how that actual trigger bar reacts. Cause this is actually how it sits in the gun, in the right exact pins and everything. So it's pretty cool how you can see right there. This is where the trigger is sitting. That's your first stage bump like we were talking about right there. And then as it travels down the connector, that's how it gets dropped.
Now, one thing I didn't discuss is this part when the gun cycles and it's up there, this is reset. You see? So if you would think of the angle being more graduated, there's going to be less material behind this bird's beak. That way when you reset, it's not going to be as long. So that's a 3.5 connector. So that's your reset.
So basically if I'm taking all the pre-travel, I'm setting it right there. And so all you have with this connector is just about that much movement and it breaks. As the gun cycles, since I have a stop, it's not going to have to come as forward, as far. It's going to be about right there. So it's going to be, and then once again from that point, now that you're soaked up all the pre-travel, break, gun cycles, reset, pretty snazzy, huh? Anyway, it's just good to, at least for me to keep eyes on this kind of stuff.
01:57
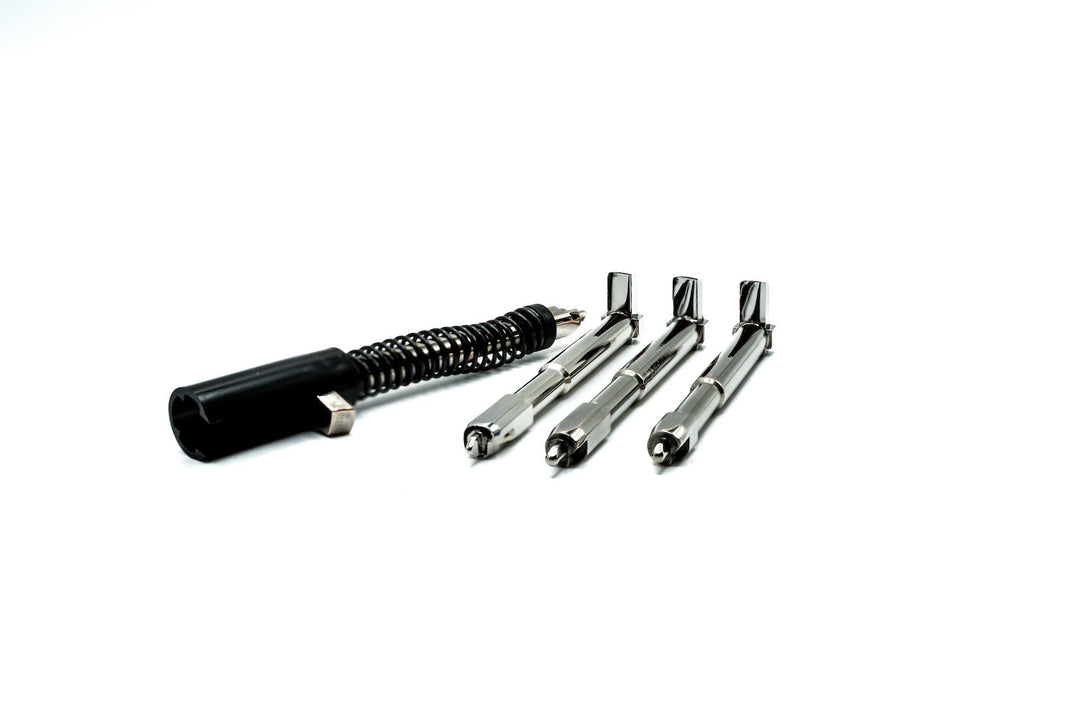
So how do you get this shoe off? Okay. Basically the tools are a quarter inch punch. And the first thing you want to do, it's better to have like the, you know, the bar hanging off the edge of a table here. You don't want to do it over a hole like this because it'll sprawl out and break the polymer away from there. But you can see it's a blind hole so you can't see it from this side. So basically what you're going to do is you're going to set this on your trigger pin, quarter inch punch right on there.
And then you can use it, you know, like something like this, jeweler’s hammer. But sometimes just a regular hammer beam is even better because you don't have to do a couple of hits. And actually if you can see that on there, it left a demarcation. Just very subtle. But that's all you need right there. Actually, I'm going to show you the difference of a jeweling hammer and like a regular big boy.
All right so if we put this in there now and we take a bigger hammer, just do one hit, sometimes if your eyes aren't that good. Yeah, it didn't give me too much more to work with, but it's a little bit more pronounced. You can see it, now at this point you're going to put this hole over a hole, whether it's, you know, something that's simple. I just have one drilled here because I do a lot of this or like that's just from the counter sunk. And I'm going to take the tip of this, which you can even make these, I mean you can use, you can use a punch and straighten out. It's pretty tough steel. This is just a, you know, something I bought I think from general. And you're going to come right directly into the hole, into that marking and you got to line it up. Good. Put a little pressure down on it. So you're actually creating a dimple there and then come over with this. And this would take a couple. Like I said, I usually use the hammer, but you can see it came right out. So that is all of a hole, you have to get this trigger shoe out. And that was unbelievably easy. I hope you all can see.
04:13
It's a lot easier than getting the trigger safety tab pin out like the other video that I showed. But and then actually if you don't want to have that hole, I use like a less, I think this is like 4.5 Watts or something like that. You know, you can just lightly, you know, brush over top of this back and forth and get that hole filled up really nice without even any kind of real cosmetic, you know, cosmetic problems as far as aesthetics are concerned. You really can't. It's really hard to see that.
So, and that's basically it, pretty simple. Just like I said, make sure when you push it this way with the punch, that you're not on an area that doesn't have anything underneath it. Cause it'll break. You'll see, it'll take, it'll make a crater there. I really don't have any extra shoes to show you that. I'm sure I do, but I'm not going to waste them. So you don't want to do that. You just want to, when you flip it and you're coming through the other end of that blind hole, that's where you want to have it in something that's going to allow that pin to push through, that pin right there.
So that took all of about what, 10 seconds, 15 seconds. And like I said, once again, this was the little thing I made here. So if I put a 4.5, 3.5 connector in here, you'd see the different angle, how it would drop. And this is kind of how I study, how my groups are going to work in the guns. If I'm doing something like a 1911 style trigger with that really quick break, I’ll get, want to make sure I don’t have a ton of resistance right here that I can feel. And this is without any, this is even without the striker spring tension countering it. So yeah, that's about it.
06:09
You guys take care. Another instructional video here from me and I'm going to keep trying to follow up with as many as I can. If you have anything you want to see, you can leave it in the comments below. I'll try to make a video on it and see what I can do. If you have anything that you, you know, like, or are dying to know about. And that's about it.