Glock Connector Geometry & Spring Combinations Part 1 EDUCATIONAL ONLY
TRANSCRIPT | Video Link
Hey everyone, it is Johnny of Johnny custom Glocks.
I've been promising to do a video on connector geometry and some other things that are pertinent to knowledge to choosing what type of break you want and what kind of pull and all those kinds of attributes that I talk about and characteristics that I talk about with my groups.
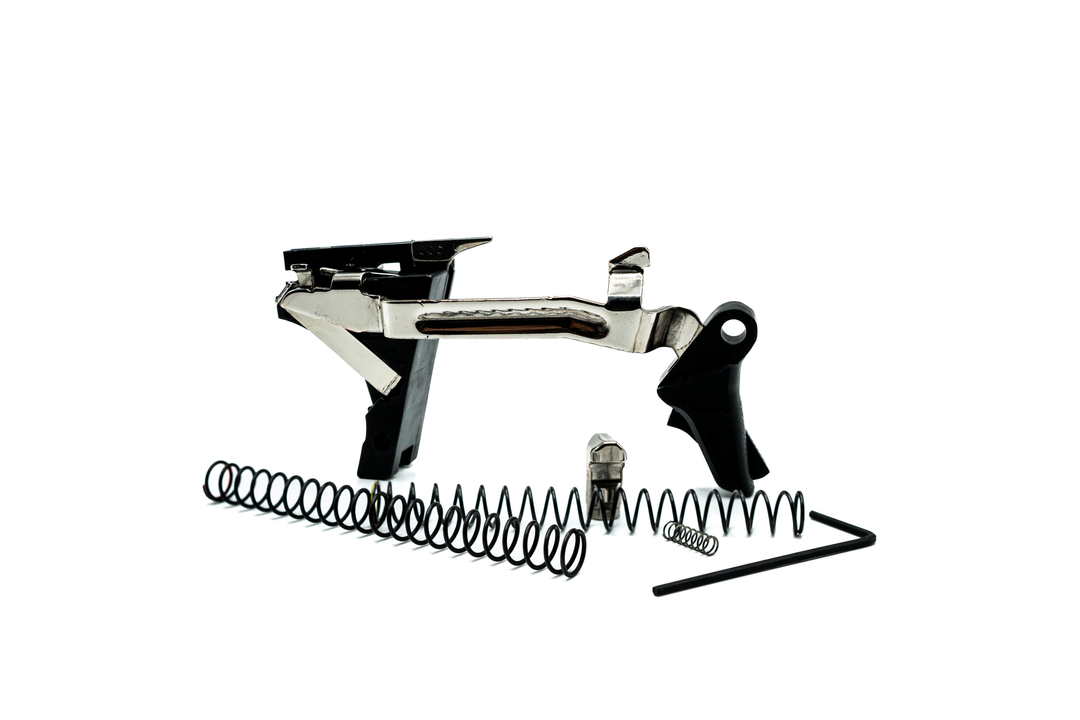
And I thought I'd start out by, you know, just a little nomenclature and whatnot here. If you're new to this there's something that's called pre-travel. So a little, the pollen is killing us down here in Florida, so that's why my voice is a little stuffy here. But you have something called pre-travel, which is basically this right here. It's before the actual bump of the bar, which we call the bird's head or the bird's beak hits the connector. Okay. So that's like the stage one thing before you actually break.
So stage one is there. In stage two, what they call it. So this is a two-stage trigger cause there's cock and as you're going back it's still cocking and then break. So you can see this part up here. That's called the cruciform Kick up. All right, we call it, a lot of people call it the sear. So first bump right there and even though it might not look like it's really the first bump catches very at the right at the kind of top of it. And then as it runs down the connector, depending on what connector you have, you can see it's dropping pretty quick. But there's also resistance here. There's a lot of resistance, the way this is designed and that's why with your 5.5 pound fixed in a production gun, even Glock will tell you they can leave the factory anywhere from 4.9 to 6.3. A lot of discrepancies in these systems because they're stamped parts.
02:15
So basically that is the mechanism right there. You want to know this is called the trigger housing, the triangle, the black triangle. There's a spring in here. It's called the trigger spring. Some people call it trigger return spring. I just call it the trigger spring. This whole entire piece is known as the transfer bar. This, some people call it the shark fin is actually called the vertical extension. It is what depresses the safety plunger. The third safety on the Glock, not that it works in unison, but one, two, three you got to number them.
And here's something interesting. A lot of people don't know this. You can see this does not have an ejector on it. You can basically push different ejectors into, let me get this off first. So you can see this into the housing's pretty easy, huh? So here you have a 9mm ejector in here right now. But if I needed to change that up to a 40 or even a 45 cause they're all the same, I can do that. 10mm and the 45 are the same ejectors.
So I'm going to reiterate one more time. This angle predicates the resistance of the break. Okay. So a lot of people will put just a 3.5 connector and keep the rest of its stock. It's actually not a 3.5 connector. It's a 4.5 connector and it gives you a 3.5 pound break. And I'm going to show you why because of the relaxed geometry right here. This is a standard connector and we're watching the whole thing in standard. So also as far as nomenclature is concerned, this is the trigger shoe safety tab. Pretty easy to explain the tab. This is the trigger pin, trigger safety tab pin and the whole thing is called the shoe. And I guess this would be called the trigger pin hole. Anyway, so you set that aside.
04:32
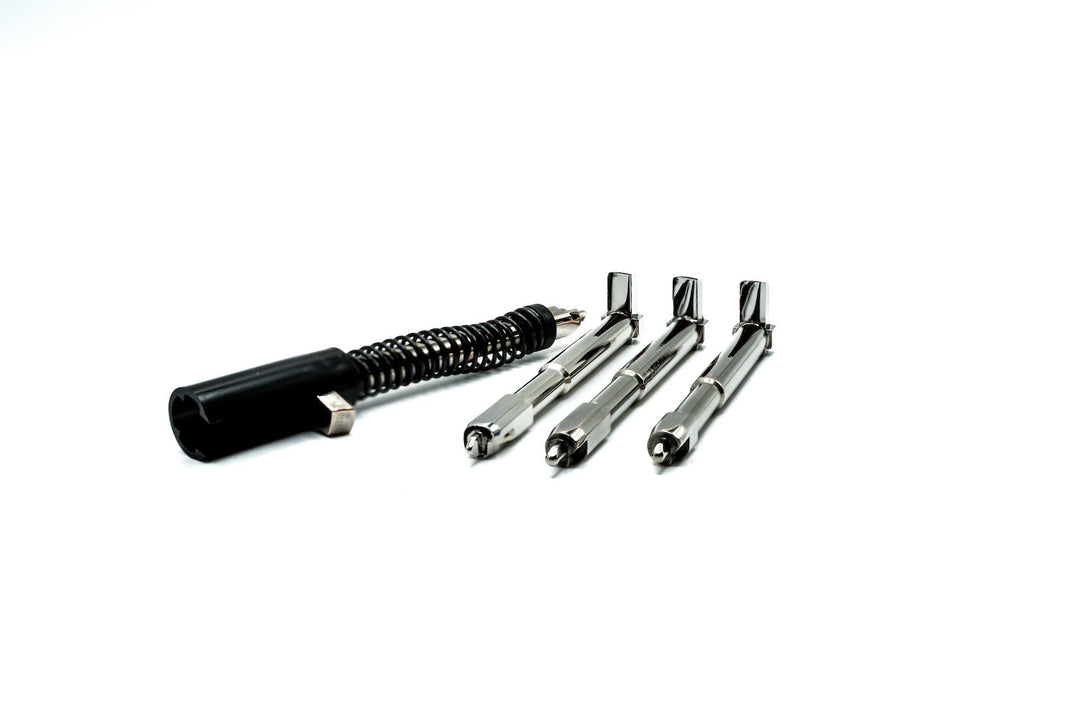
Basically what we have are four different major connectors at our disposal. The first one is called a 6.0 pound connector. It's got a very harsh angle, the opposite way. Here we have, I wouldn't say harsh, but it's going to give you a lot of resistance and I wish I could get them on a 45 so you could see him better. Maybe that would make more sense of how they're going down, but I have a drawing for that. So the 6.0 pound connector, this is your standard 5.5 pound connector right here. This is a dot connector, which they call a 5.0 pound connector. And this is, I didn't have any Glock, a 3.5 pounds. I mean 4.5 pound connectors, but I use the double diamond. So you have the six, the five and a half, the five, and a four and a half. Okay so all of these yield different pools but stock in the Glock, the reason they call this a 3.5 connectors because it gives you that break. They call this a 4.0 pound connector because it gives you like a four pound break. Like it feels like most Gen 4s have a lighter break. They don't absolutely they have a different feel to them, which makes them feel like they have a different break because in order to keep it 5.5 they had to change some other things on the bar. So basically then you have, like I said, your 5.5 which is standard fixed and then your 6, which you rarely see in guns.
06:08
And I want to bring this up because I’ve been criticized of, you know, being too, saying there's too many nuances for the trigger. You can't make the Glock trigger do this or there's not that many feels. So we have four different connectors. Those are going to give you absolutely four different feels. This is just even, this is even no pre-travel post travel we're talking about, nothing like that. You have a 6.0 pound spring, you have a 5.5 pound spring, you have a 5.0 pound spring, you have a 4.5 pound spring, and you have a 4.0 pound spring. So it's one, two, three, four, five, five different springs, four different connectors. That's say what? 20 different combinations right there, 20 different combinations just with these two parts.
Now try adding the safety plunger spring, which there are two of. And also the trigger spring. I really don't ever advise to use anything other than the standard spring back here, it slows the reset down way too much. But I mean, if that's not proof in the pudding, what is? There are so many different feels you can get from these connectors. It's unreal. Actually you know, I’ll make a case-in-point. This one the EVO connector. Most of the stuff I use are ghost, I mean, is Lone Wolf, but I think they did a pretty interesting job on this because if you can see and we stack it up against another one, at least they're thinking, you know, the idea is to lengthen the connector edge. And as you can see, it's kind of hard to see they've done that. So see where the starting point of the connector is on the bottom one right here, that's going to pick up your, that's going to pick this up before the other one does. Simple geometry, not because one's in front of it.
08:09
So it takes away, it really, really lessens that first stage bump that everyone talks about and shooters that tend toward the EVO, just like an even kind of pull, pull, pull, pull, break without that real feeling of that first stage and it's palpable, you know what I mean? Like if you're pulling this, that's your first stage right there.
And then actually I’ll take it through the whole thing. What happens is, it breaks and then the guns cycles over the tab and then it sits like this. And your reset is the trigger coming forward when the lug face grabs it again. So that's your reset sound right there. And depending on how far out you have this part bent. I like to have them both touch and right in this corner. That really does I think the best job of, yeah, right there. You can see it. So not too far out, not too far in. If it's too far in, pull in. It'll just feel like a squirt gun because it'll jump. It'll jump the connector. If you've ever had that squirt gun feeling, it'll just jump the connector. There won't be any firing. If it's out too far, there's going to be a ton of drag because you can see on this one, even this is marked just from the polymer on the inside of that gun. So if this thing is pushed way out, it's going to sandwich this piece. You know, like that's, take this out, sandwich that piece against, but sandwich that piece against the wall of the gun, the inside wall of the gun. So you really don't want this thing wanking out like that. You know what real far like this either.