Glock Connector Geometry & Spring Combinations Part 2 EDUCATIONAL ONLY
TRANSCRIPT | Video Link
Okay. Back again Johnny Glock. Looks like my camera didn't have enough space so we're going to have to do a part two to this.
So like I said, there's plenty of combinations that you can do just with armoring and you know, basically I’ve never seen a chart. I had one at one time of what like all these different things can do and how they feel like it at six, five, six, five and a half, four, I mean 6, 5.5, 5, 4.5 and 4 for 3 and 1/2 connector, for a 4 and 1/2 connector. And then the same thing for the dot. And then the same thing for this one, the same thing for the plus, for the standard.
But what I want to do is show you, cause a lot of people, like in this short amount of time, you really can't see it if I'm showing it to you in this format right here of like that little bit of space, you can sort of see it, but it doesn't really become apparent of exactly how much longer the break becomes. And so when people use the 3.5 connector, and I'm just going to call it that because most people are not going to catch what I'm meaning is they'll get confused. So the 3.5 connector is going to give you less resistance but at the same time...and a lighter pull. But at the same time your compromise is a lot more travel because of the striker-fired system. Let me actually fold this, like keep everything in a line here.
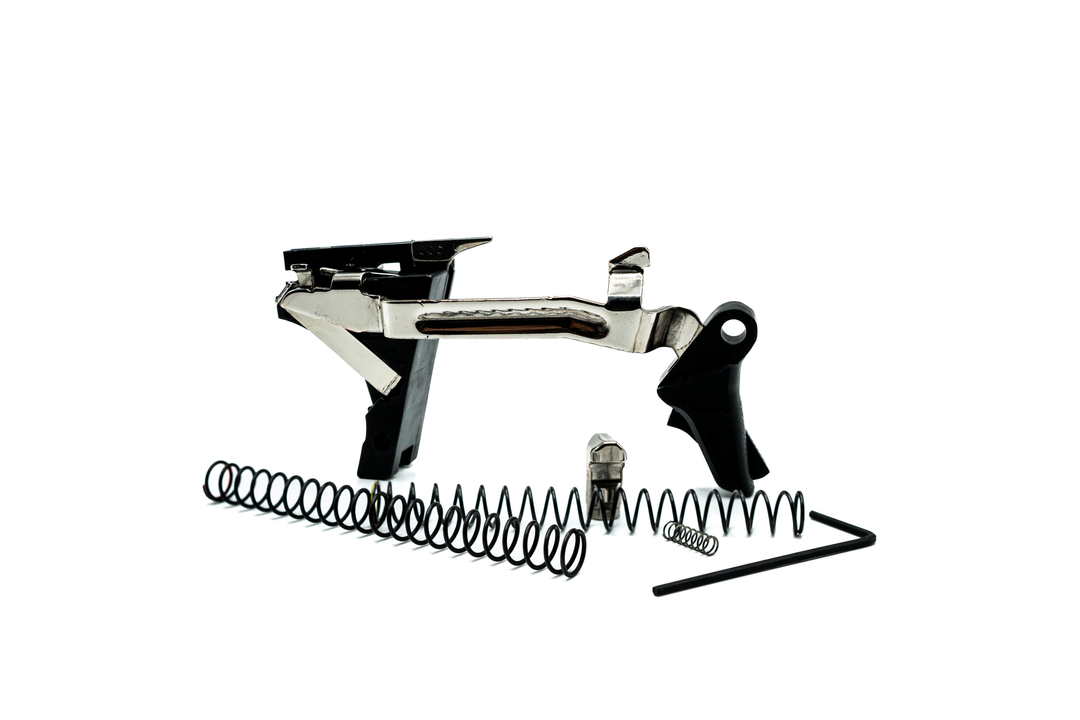
So here's today's little schematic and I guess I can put these back up above it. So you can see the connectors that I'm talking about because they're basically the 6.0 pound, which is this one, standard 5.5 which has no markings on it whatsoever. The 5.0 pound, which is a dot connector, which is, bring it down a little bit, which was this one right here, the third one, and then the 4.5 connector, which actually everyone calls it a 3.5 connector right here. And like I said, I didn't have a Glock one, so I just used this double diamond and I showed you guys all the markings on the back. I think I showed you the marking's in the back, if not, plus, nothing, Dot, minus. That's how you differentiate your connectors.
02:20
And Glock is the only one that has this lightened area right there,
pretty much. I think the Glock spring steel is the best period. You're not going to get anything better than that spring steel that Glock uses. Like I said, I endorse Lone Wolf products and I'd like to use them. The thing is they have a quicker reset than the Glock. So basically this is showing you over time what these angles can do. These are the exact angles of these connectors, which is right here at the top. The angles of the Tab face or what you would call it, some people call the edge of the connector. So basically when you butt up against this, and so we have to start at the same contact point for every one because that's basically what happens with the Glock. You're starting at the same contact point and the same radius. And as the trigger drives backwards like this, you're seeing how it's dropping the cruciform.
This is grossly exaggerated, but I wanted you to see these angles. So basically over and over what would be an inch, it's 7.8 to drop. So that's the length from here to here. That's quick. Then with the 5.5 pound connector, you see it incrementally, it goes up each time by a quarter here and by an eighth here because these are closer. So basically the 5.5 pound connector is driving that bar down at a little bit less of a harsh angle is this, I hope you're all following me on this. Pretty easy and that's inch over an inch. This is 45 degrees, so it's kind of square. It's a no brainer. Then the 5.0 pound connector, which is the dot connector is a little bit more graduated. But as you can see it takes a pretty big jump right there to go all the way from the break point down. I mean from the contact point all the way down to the break point.
04:22
So that's one and a quarter. These values really don't mean much. I just wanted to measure them and actually show you, don't mean like they don't correlate too much other than the length here of the pull.
So 4.5 connector as we call it, 3.5 connector you can see all this travel. There's a butt. Like when I talk about that relaxed geometry, this is what I'm talking about right here. It takes a long time for that break. And this is where contact your wall and this is where you get that spongy feeling when you're really just maybe breaking right there. It's like a lot of sponge. Now this has a lot to do with engagement too, depending on how your you know, striker is sitting on your sear, you want to be 100% engaged, but there's, you know, tricks of the trade you use to do some other things.
But you know, basically this is what happens when you swap out your 5.5 connector for your 4.5 connector or your 3.5 connector. You're creating a longer pull for the trigger. Less resistance, but a longer pull. So it almost feels rolling in fact. So you lose, with each one of these hard wall...
Let's do it this way. If I was to push a barrel up this, it's going to be really hard. Just going to, I'm talking like this, I'm going to push this barrel up like that. Well actually it would be like this. So if I'm going push something up, this is going to be hard, which gives you the hard wall. This is going to be a little less harder. But nonetheless, it's just a little bit less resistant than that. You're going to really still be busting your butt. Here, not so much. Here, really easy. I mean, it's longer, but it takes, it's going to take longer time to get to here, but it's a lot less harsh of an angle, obtuse angle. So basically here you have that really quick, fast, sharp angle. And then on the other end of the spectrum you have the really long ones.
06:32
So this is the travel time. This is the travel time. You'll get this barrel up the hill quicker than this one, but it's going to take more effort. And that's what you're feeling when you hit that wall. And I talk about solid firm yielding, you know, all those terms for wall feel. And then the break point too, you have your break feel because if you're building in, some of these have to go hand in hand. If you want a rolling break, you're going to build it with this 3.5 pound connector cause then you can just break it off. And that has to do with some engagement tricks and some tricks with the bird’s beak as well. And guys that like more of a tactical feel but still want a little bit of the resistance of this. You can build this one a certain way to be super quick.
So say I take out all the pre-travel and you're sitting here, click, you’re breaking about right here, you don't even have to go the whole length of the face. And my retail triggers are set for the whatever's standard in the gun. So I’ve done proprietary changes to them. So when you actually, you know, buy the pure carry or the drop bar you're going to be able to feel those changes even without a spring change immediately in the smoothness and in resistance. But it's still going to keep that nice tactical everyday carry 5.5 pound wall, but without the major resistance.
07:55
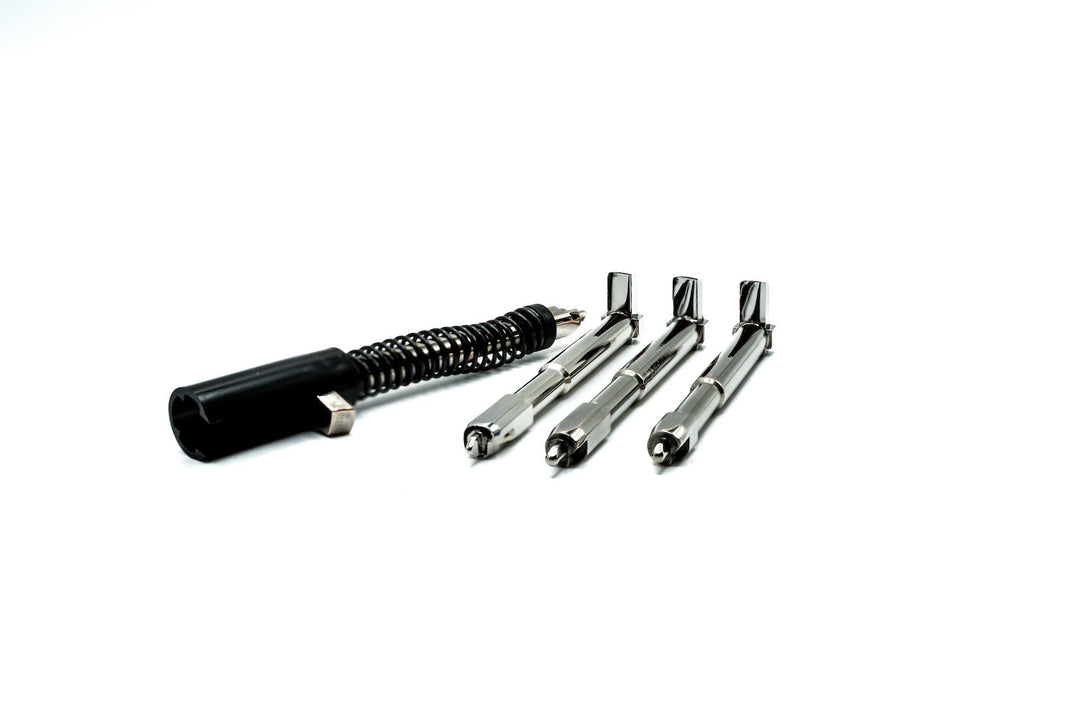
And there's some springs with that one too. So you can change the springs out. With all the kits come springs. And you know, I'm only a phone call away. So basically, please utilize that. I mean, I even take calls for people who, you know, don't buy stuff off me. Just because I like to talk about it. So this was just a video to show that I’ve been saying I was going to do this, so I wanted to do it. So you have these four different connectors. These are the standard 4 and these are the standard 5 springs. So 5 for each one. Like I said, you have 20 different feels here and if you add the safety plunger reduction spring, that's 25, you know, and all of these combinations wear of. But basically what you're looking at here is when you put that 3.5 pound connector, you are compromising your break speed. You’re going to have a spongy trigger now, it's going to feel spongy if you like that Glock tactical snap, you know what I mean? Quickly, you're going to opt more for something in the 5lb Dot Connector or the Standard Connector.
This is what I use to build 1911 triggers with. And there's a whole different way to do that. There has to be all kind of cool little things to get this thing to just, that's moving, that's dropping so quickly. It just, there's barely no movement. It feels like a hammer. You know a year ago or whatever I said, and you know, a 1911 is a 1911 and it is, and we know that, but the point is to get the Glock close to that, which people want. This is the kind of thing you have to do. You have to think outside the box. Like why in the heck would he use a 6.0lb pound connector for that? You know, that's way harsh, but you have to, like I said, armoring will take you so far. You have to get to the point where you're manipulating the metal and modifying, you know where the shoe sits and all those aspects.
So anyway, that was a little video for you. Hope you enjoyed it. Johnny Custom Glocks.