Glock Striker 2018 EDUCATIONAL ONLY
TRANSCRIPT | Video Link
YouTube what is happening? It's Johnny Glock. Long hiatus guys.
But I think you'll like today's video. It's an updated version of what I already shot and you know, as things progress, as time progresses hopefully, you know, for everyone out there, technique progresses and I kind of went through it last time I did this you know, I didn't even preview the video. I just figured like, you know, hey, it's time to shoot this again and put a different spin on it. Not even a different spin, just kind of get a little bit more elaborate about it.
So you know, my camera work hasn't gotten any better. And with that said you know, I'm going to start, I'm going to take this off of here. Just give me a little transition and I have to flip the screen and I'm going to try to get it right here.
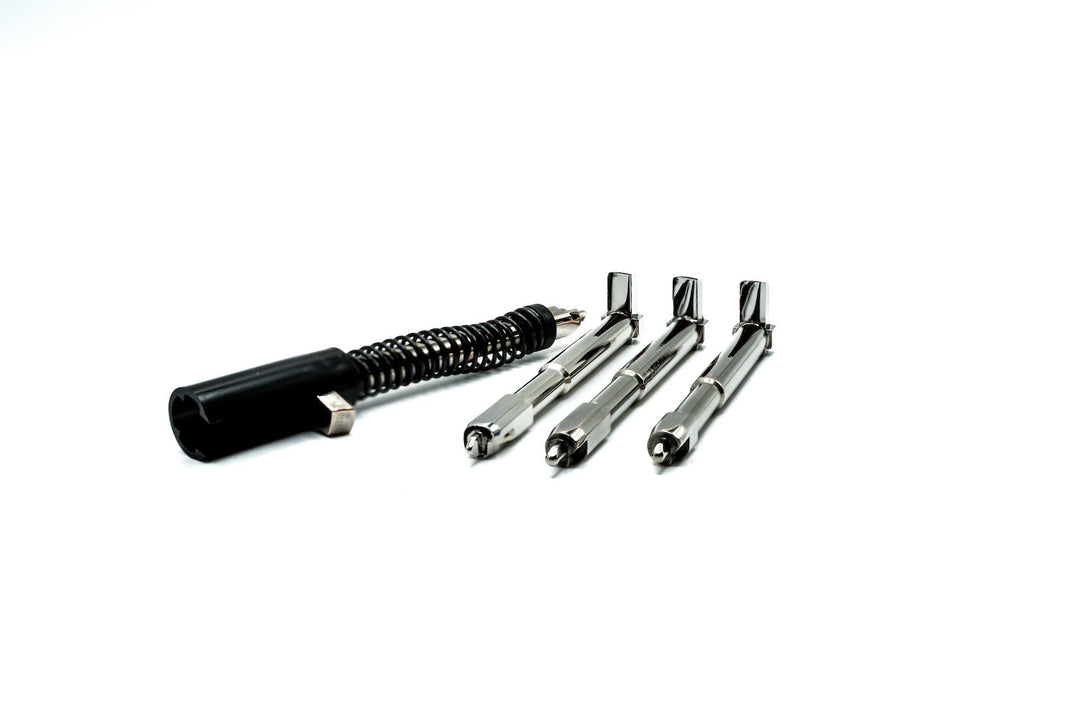
All right, let’s go over this. Here is the materials that we're using today to work these striker lug faces. All right. So I usually tend to do a bunch if I have them. And it's kind of like one of those things. The more you do them, you know, the more consistent you get and all that kind of stuff. So as over here you can see I have a piece of glass. I love these Dremel vises right here. They're pretty convenient, let me see if I can grab one for you without shaking things up too much.
Okay. So right there and they got the, you know, they have the rubber right there so you can adhere them to a bunch of different applications without having to worry. But okay. So then here is a variety of different mediums that you can put on the glass, you know, different kind of backing, harder leather, softer leather. You know, the things, this is a little bit thicker, then this one is thinner, it all depends on what I'm after.
02:11
And then here is my setup for, you have 320, 400 [grit]. I have one piece of 600 left, so I have to get 600, 800, 1000, 1500, 2000, 2500 and then I have belts that I go to after that. And so this is kind of what I do, you know, I mark, each one of these you know, individually. So I can pull them out of there when I need them. And this is really cool. I'm not giving, I'm giving some serious you know, cut, you know, tricks of the trade here to help you. I use this little; you can buy these at Michael's or Joanne's or online. But this little thing right here, man, it just slices the, it slices the sandpaper very nice and quickly. So when you're switching from sheets to sheets or if you max out on one piece, you can just throw that thing, throw your sheet on there and slice it. That's why you know this one's thinner and you can see that the lines right there, you have to cut those off so you can basically you'll get, Oh, and also very important. This is a modified, I think they call them pin vices, but I'm going to use this today and I don't think I’ve used it in the other one, but I mean this is incredible for controlling the Striker and you'll see exactly why. So I'm going to set this up like this, just like so, and you know what, let me move these out of the way. See if I can get a better shot for you guys here.
Bring it in. Actually that's probably going to do right there, Voila. So there's your surface. Okay.
04:00
Now you know, when you install this in here, like I said, I had to modify it just for a lot of other stuff If I'm doing, you know, a lot of stuff will go in here and really nicely like safety plungers and things of that nature. But you know, I am going to install this down in here and I'm going to tighten it up. Loosen it first just to get the, this is a bigger striker, so I think it's a 10 millimeter. Yeah, it is. So I'm going to start with something like this.
And you know, when you chuck it up, you want to use the square part of it, you know, just put a little torque on it so you don't mess it up the shelves here. These are rather hard to mess up with this kind of steel. But you know, like I said, you know, just don't ramp on it. So I'm going to start with 320 [grit] and I'm going to start with a fresh, you know, someone once said, why don't you use oil? And I’ve found oil to make things rust over time, which is really ridiculous that I'm saying that, but no, I'm sorry, water, water. I don't find it to be, you know, something that's you know, worth using. But as you can see right there, I want to look back here too in the, well actually I could flip this thing so I can see what I'm doing. Imagine that.
Okay. And there is you know, on the newer strikers, especially, there is copper and nickel on here. I forget, you know, catalytically you have to use, I believe, copper to put nickel on at least some of these, at least that's what I was told by someone. I'm almost sure that's the way it happens. But you know, it's that kind of rainbow that you have to go through there. And I'm going to lift this up just a little bit more to, I'm sure if you do this you'll see, like things will, it'll start to look like a rainbow. And that's when, you know, you're kind of getting through things. Dammit.
06:16
Alright. Like I said, man, my camera work hasn't gotten any better. You're just gonna have to live with it dudes. Let me see here. Okay, so there we go. There we go. That's nice. And I don't control it down here, but I try to control it like here and just let this hang. So you don't, you definitely don't want to be like this. And this is what I was trying to explain in the other video. You want to, let me get a little lighting on this situation here too. It's better to be a little bit more, you know, turned in like that, especially once you start using the, you know, the backing there, like leather or something like that. If you go the other way, man, you're going to just, it's going to be bumping. The sear will bump the striker every time. So let me come back over here. I want to make sure I'm getting this, there we go, in there correctly and that my camera is not going to fall off. Okay. And we're going to start.
So, by the way, there's my arm. Everyone keeps asking about how it's healing. So I figured I’ll show you. Yeah, look at split my Chinese symbol for essence, right in half. So I guess my essence is split for those of you that buy that kind of thing. So here we go. I try to keep this as flat as possible. And just going across here. You don't have to go that fast. If this is one of the first times you're doing this, and I’ve already filled the whole thing full of metal. So I like to make sure these are clean that way I can...
08:23
You'll be surprised too how, when you are taking the material off here you would think it would be a lot more consistent but it really isn't as far as how it's, you think it would be completely flat but as you're sanding and if you are actually trying to keep it flat, you'll see it's not actually that way. Same thing with the sears and all that stuff. They kind of have to be worked out to be that, like that. So let me see if I can get a close up of this. And I’m going to put my hand here because that always helps. You can see that, [I’ve] taken a good amount away, but you know, it's definitely not where I want it to be. And so you guys can see the grain on there. So that's still at 320 and you have to remember too, I'm only looking to, it's less is more. I only really want to take away, maybe the, if you're looking at it from the side, just you know, only a 16th of an inch up. It's really all you need are, you know, 3/8ths or a 1/4, something like that up the striker lug face. You don't have to go, I mean, they look, they get done the whole way up to here. But the point is this is the only, this is the only place the sear is going to touch it, is at the very bottom.
10:00
So that's the most important, like you can see, right, okay, you can see the rounded area right there. That needs to come off up maybe a 1/16th of an inch more. And then that way I'm getting exactly where I want to be and I hope you're all able to, yeah, there's a really good shot right there. So we're just about there. And like I said, I like to really with this process, as I'm taking off the initial, I like to really make sure that I'm using a fresh paper. It really helps. And you don't want to rock like this or rock like that, you know, you want to keep it as you know, as this would be considered, you know, perpendicular as possible. So you want to keep it [as] perpendicular as possible. And let me see here. Almost there. Once again, let's see if I can get that angle that I did. That was a really good, you could really see it well that last time when I was able to, yeah, there we go. Once again so you can see that.
Uh oh. Gonna have to let that ring out. That always happens. I'm basically almost there. I am going to go a little bit heavy on this. I'll grab this part of the paper right there. That's why I said I'm shooting this again to be very specific. Gotta be perfect guys. I'm actually going to put a piece of hard leather down there right now just to really get to the, to get where I want it to be. And you'll see as I pull it back up, it's going to be there. Yep, Perfect.
12:05
So there you go. That’s really don't worry about making it pretty as far as the rest of that goes up there. You know, I don't, you know, completely concerned myself with going and doing and doing and doing to get that off to make them look pretty. You just want to make them function. So that's the first and then we're going to go to 400 [grit].
Yeah. And I'm going to keep the leather on there cause I kind of liked the leather. How it works. It's got to be very hard leather. This is like a very hard piece of leather. Like I said, you want to keep that outer angle going. All right, cool. And I keep inspecting it, you know what I mean? Cause I want to make sure it's, you know, meeting the standards that I have for what I'm doing. There's another shot right there. And you can see it's still taking some of that off. Even with the, what am I trying to say? The finer grits. That's the word. The finer grits. So now we're going to go to 600. Line that up. And remember this way, you have to pay attention that you're not canting out. You want to make sure it's that way.
14:05
And typically if I was doing this, I would be you know, have a couple of these, so I'd have three of these littered up at the same time or four of them. And you know, do every single one as you know, successively. So I'd pick up the next one, then the next one, then the next one. So here we go again. Now there's actually some...get that off of there.
You can see I'm starting to come around and now 800, slice that down that literal skinny piece here. If you do this a lot like I do, you got to save every, that's why I use the little, you know, this cutter right here. Cause you can see the little strips that it's cutting away. You know I have to be very efficient and not waste paper. Cause you just, you're doing a ton of these. You just don't want to start wasting stuff. 800 [grit] and usually right about a 1000 is when I’ll switch. And I do sometimes go past the point with the finer grits of like the paper being completely filled, the sandpaper because sometimes it helps polish it out a little bit.
And like I said, you can see this part, what it has like the rainbow edges is actually just coming away on its own. Just do a little wipe here like this. So now I'm going to do a 1000 [grit] and I'm going to do one of these 1000s with the leather. You can really see what the paper too on...how this stuff is, how it's working. It will be a guide for you where the.... So I wish I could get this. Okay. I have to start back here. So you can see better.
16:48
This is so hard to really get, to really catch sometimes. So now I'm going to flip out of this and go into a harder backed. You get this at Home Depot, or you know, or Harbor Freight. And now this is a fresh cut piece of thousand. At this point I'm not really removing too much metal. I'm just refining. I mean I am, but it's more about getting to the polish of it all. And this is pretty hard. There we go, just skip the making a shot on a 1500.
Keep overshooting right there. So sometimes I’ll put my finger there, so I won't continue to do that. Let's do another, see if we can get a really good shot at this one. Yeah, there you go. You can see it's really, especially, it's really starting to take shape the way I would like to see.
18:16
And then 2000 [grit]. And then I'm going to switch to even a more buoyant I guess it's, I guess you could say it has more give in the back there for this 2000. It's almost goes in like a mattress, you know. Cause the 2000’s really doing, just barely removing the metal, and mostly polish. And then 2,500 [grit]. And you know, they make the 3000 grit and above pads. You know, they kind of like scouring pads. You can get 'em like automotive stores. I really don't love those because they just don't work the way I like them to work. And you can see, I'm really kind of canting it to the inside when I’m doing this because I have the bounce of the, you know, the give of that. And then I am going to run it on a belt, this is a 5,000 grit belt right here.
Hoping you were able to see that belt, but then I'm going to bring it over here and let's see if we can get, hopefully even get an awesome shot at, Yeah, there you go. So that there is perfection as far as the Striker Lug face is concerned. And then you can polish it out. See if I can come in a little bit more. You can polish it out. And sometimes the way the light's hitting it, it might look like it's rounded at the bottom, but it's just, it's the way it's catching the light right there. So if I go like this and you can see it, it's not rounded at an angle, like a negative angle because that's when you're going to get yourself into trouble. It kind of looks like it just because of the, you can moon it, you know, kind of be like a half moon like this just for surface area reasons.
20:10
But like once again, you have to make sure your engagement is on, and a couple of other things there. But you can see the edge right there at the very top. That's exactly how I wanted it. I want it nice and polished. Because like I said, the sear’s only going to be grabbing it like right there. Okay.
And then a little polishing compound. I like to use something that has some grit to it. Like you know, I mix a couple of things together and keep it in here because I want something that has some grit to it. And I just put it on the tip of my finger. See if I can bring this down here. Tip of my finger. The Striker. Get it out of this. A little dab will do ya. Take this bad boy up to 20,000. This has lights too.
I'm not a big advocate of taking material off the sides. Because sometimes people take the material off there and there. I don't really like doing that. It really gives too much, unless there's an issue, you do that and you'll hear the Striker and the Channel, it'll go, “duh duh duh duh”. You know, starts to shake right to the left. So unless there's a real issue, I really tend not to you know, do that. But let me see if I can’t get a really nice shot of this finished product here for you. God, I hate doing camera work.
22:04
That's probably as good as we're going to get it guys. Maybe I’ll flatten it out and see if I can get a better... There we go. There we go. It's focusing now, it's focusing. So now, we're out. Now, we are in. Now we are out. There's a little polish still on there, but that's basically, you know, what you're looking for. You want that Striker lug face is half your break field. You know, so let me grab a bar here, you know, the sear and the striker come together like this and you know, I already feel, man, it is just, Oh my God, it is unreal. How just, and I think this is a finished. So this is one of my bars. It's finished back there, you know, so these, this part and this part together, just create this awesome break. I don't care if it's a like carry gun or competition [gun].