New Glock Connector Geometry Long Version EDUCATIONAL ONLY
TRANSCRIPT | Video Link
Hi everyone. This is Johnny Glock here from Johnny Custom Triggers. And I wanted to explain a little bit to you today about the, put a little blurb video out there on Facebook and YouTube and my website about the new geometry of the trigger and how I can achieve with a 4.5 lb (pound) spring, sub 3 lb (pound) trigger pull. This is all because of the new geometry that I'm using. And I'd like to just explain a little bit about it.
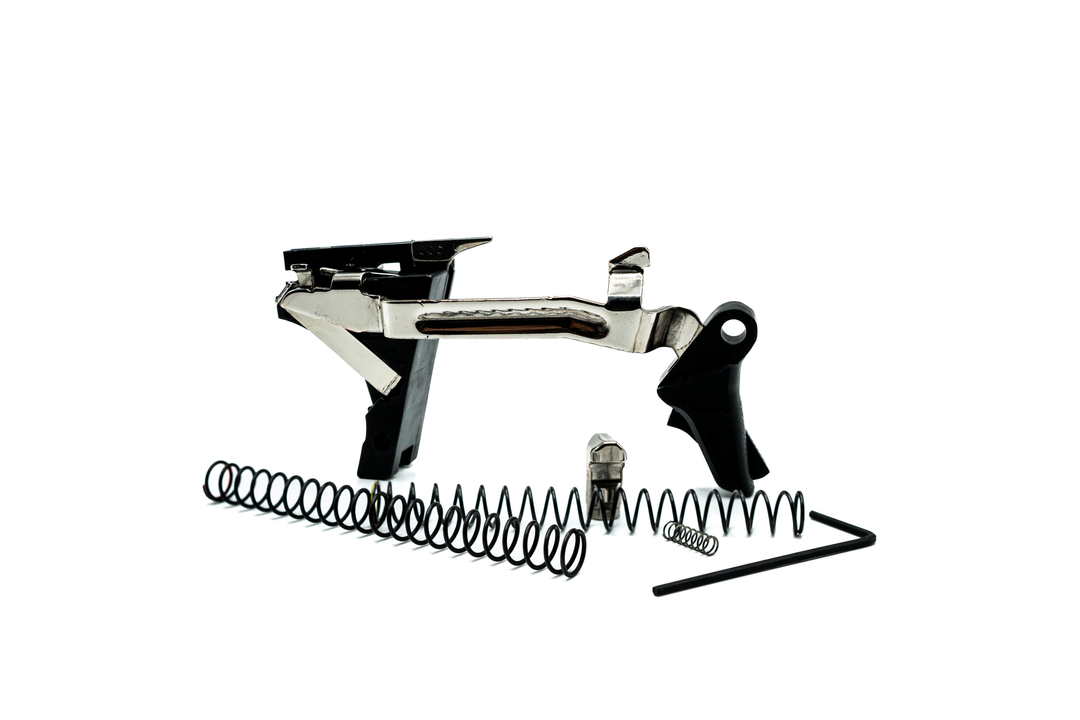
I'm going to bring the bar up here first of all for you to see it. You can see at the beak end of the bar, very high polish and it actually, it has sort of a convex stoning to it on top of the high polish. That's perfect right there in the rear. And you can also see the sear geometry has been changed, and actually shortened. If we look at it, if we look at it this way, I'm going to try to get a good, there you go. That's glowing right there on the end. That angle right here has been pretty much changed.
So not only are you 100% engaged, you’re very flush. That was the reason why I did it right there. So, and I’ll show that in the gun that I did. Clear gun. That I actually did the video on. When you look in the back, and I'm hoping I'm doing it justice right there, you cannot see at all the sear coming down out underneath of the striker. Now, Glock allows by their standards in this relationship right here, they allow ⅓ to be hanging out. Mine is 100%. That is probably about a third of it sticking out.
02:04
It means less travel, but it also means, you know, you drop the gun. It's one of those things, it's not the safest. And you might have a range officer that could disqualify you or you know, it's up to you. You have a lot of responsibility with your fellow shooters if something becomes unholstered, and drop a gun in a horizontal position, it goes off. That's why if you ever do shoot a Glock, it feels too much like a 1911. You can rest assure that this bar is sitting about right here. So if you would drop the gun and boom right there, you're off the shelf. People always forget about that third, the second safety first safety is the trigger. The second is this horizontal shelf drop safety. And the third is the firing pin safety. So basically my trigger system has you sitting right up on the shelf, you're still on the shelf, you could drop it all day long and the inertia, it's just going to come down on top of that shelf.
Also because I soak so much pre-travel out of the system and it has you starting prior to that, like a normal Glock here. And then you hit that kind of first bump stage. With this system you're right about there just even to start. So because you are there to start, we had to shorten the sear right here and change the geometry to match all the different tolerances and all the different parameters.
Also something to be said here with the, right there as you can see, the face of the fin that is a 6,000 grit, ceramic stone coming down there. And with the new safety plunger you get with the kit, it is another one of those engagements that's completely smooth. Glass on glass, no grind, no creep, no nothing on this, on these two pieces right here.
04:04
You know, the only thing that some people have to do when they re-install and I know, enough of you have taken enough Glocks apart. You can see a little marking across the, a little marking line on the back there. Across this, across this striker face right here. But sometimes because the angle is so off on your factory guns, it will actually put a tooling mark, it will chisel into this area. And you have to, I'm trying to think of the right word because you have to take...you have to get it smooth basically. But you can't take all, you can't go into it like a bull in a China shop and start removing massive amounts of metal. You have to go slowly, slowly, slowly till you get a nice smooth, smooth feeling on the striker face because that is a major engagement of metal to metal point right there where this slips off, drops off via the connector angle.
And since I use a, speaking of connectors, a Lone Wolf, 3.5 connector, and as you can see, I am working the face of that connector with a custom stoning. I have kind of jigs that I’ve created for all this stuff on Rolling Arkansas stone. So it is consistent every time. You know, you can't work on it out of the, really out of the housing because then you know, as you start to realize when this is in reset, this whole mechanism is sitting over here, it's different than it is like that. See how I'm changing; the whole angle gets changed by probably about 20 degrees from here to here. And so when I am stoning this, and this is part of the new geometry and this is why you can have such a quick aggressive reset with my system, I am stoning this at an angle. So this right here, it's almost like your gun has a natural point. It's naturally going to go that way.
06:07
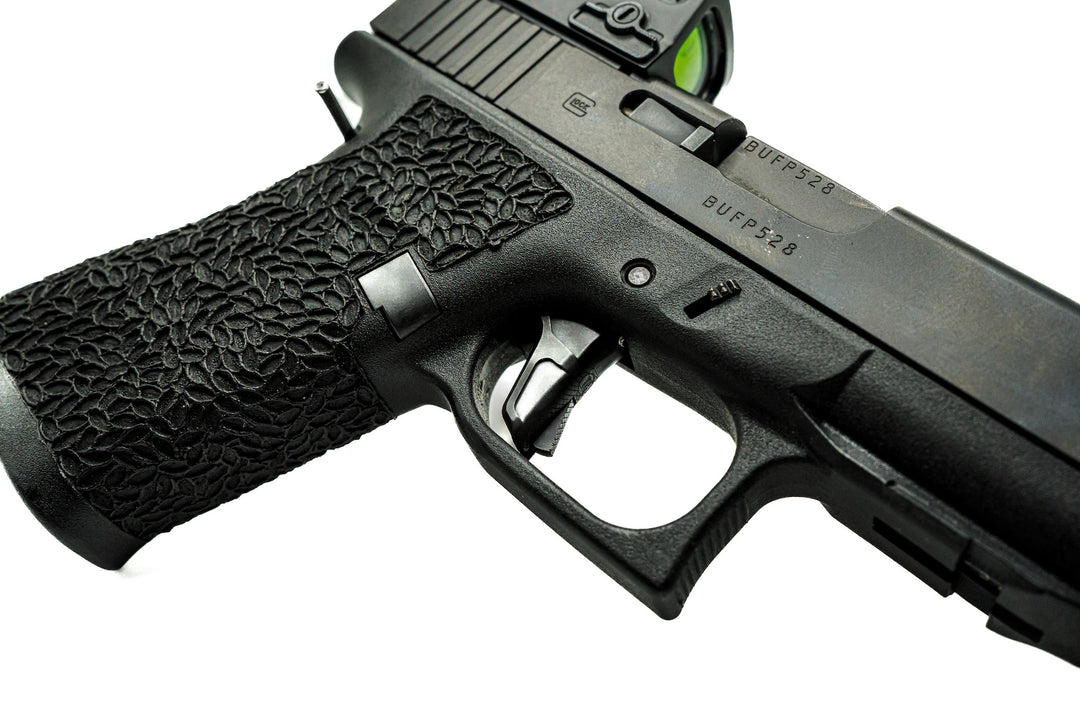
The way I designed this is so the bevel angles I put on, the bevel angles I put on to reset as the gun, this is the sound you hear right here when the gun is resetting, it's this snapping of it off. What's you are actually experiencing is a bevel downward and forward on the connector. So that naturally makes this transfer bar want to engage forward with just a little bit of release of the finger. So I already showed the gun was clear. So even at sub 3 lbs (pounds), look how quick that's coming back, you're not, there's no hesitation. There's no weight. And like I showed in the video, there's really no, there's no take up here. You are on the predictable wall and every time you have the trigger; you have the trigger safety coming back on so you're not going past there. You're not going, going to bring this into a little bit better focus. You're not going to go past the frame right there, and you know people that shoot aluminum triggers know their finger has to be lower to this point, which means that there is a longer stroke.
The higher up you get to what is called, and I'm not talking fulcrum how most people think fulcrum. I'm talking a true fulcrum. And that means the fulcrum, right there is where this pin goes through, that trigger is where everything is fulcruming off of the higher up to that actual fulcrum that is on the Glock trigger face. You have a shorter stroke. See what I'm saying? There's a lot less movement from here as opposed to having your finger down here. You might think it’s minutia but talk to competition guys. They know exactly what I'm talking about, and so like I said, if you pay attention to that little dot that's in the trigger shoe, that's basically, I get a pointer right here. You'll see such a minute amount of movement back and forth with this trigger set up and how quick and aggressive it is. And it's sub 3 lbs (pounds).
08:17
So those are the three main things that I’ve changed. And this here's a Glock right from the factory. You can almost see all the burrs and everything on the round of the beak of the outside, especially here. Look at the drip. That's just not anything precision whatsoever. Right there. Perfect example. Perfect example. Same thing with this I'm sure. This is just any arbitrary bar I grabbed out of my lot and the difference is absolutely unbelievable. So those are the geometry changes, the geometry changes happen at the sear angle, the shortening and the actual wrangling right there of the sear.
Actually if you can see it, it's a whole different angle where the sear flushes up against the striker and the angle change of customly working the face of the connector right there. Those are the two major game changers that allow this system to be what I’ve seen and a majority of competitors that I know, in my opinion and in my measurements, it's the fastest system out there right now. I mean, this thing is resetting just with no take up, even first stage take up. You're right there on the wall.
09:57
Once again, this is Johnny Glocks from Johnny custom triggers. Check us out. www.johnnyglocks.com. I also have a YouTube channel, which is Johnny Glocks LLC, and made sure you put the LLC after Johnny Glocks. And then my email is getjohnnyglocks, Get Johnny Glocks at Facebook. I mean, johnny[@]johnnyglocks.com. And of course, Johnny Glocks on Facebook. Lots to remember there. It's not my favorite part of the job, but nonetheless you have to manage those things.
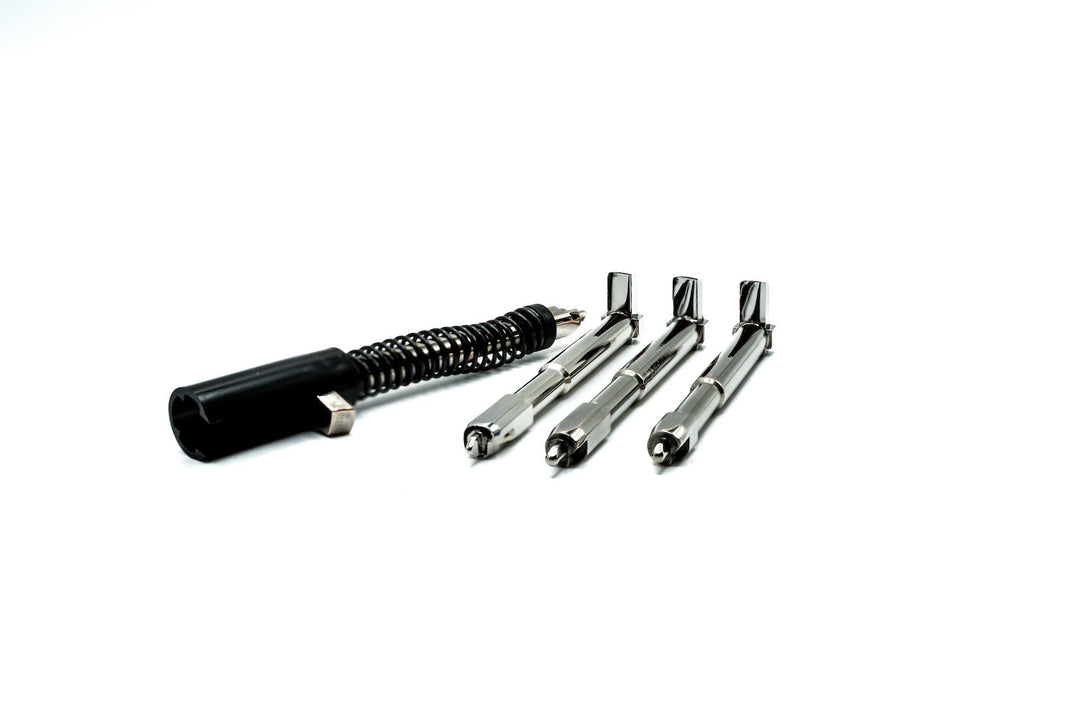
I just want to say I appreciate all of the support. I appreciate all my vendors and everyone that's basically supported me. I didn't want you to have to go out and buy an extended striker. I thought I knew that there was a way that you could knock that out of the equation. I'm a big fan of Glock and I think this, the inertia and the speed and everything with this OEM Striker is perfect. So why spend the extra 70, 80 bucks on extended striker? You have other things you can spend that money on and if you can pull it off 100% reliable without having to go the extended route and keeping it in there. And in fact I'm not, I'm going to suggest you don't use extended strikers with my system because that's not how they're designed. They're designed to work perfectly well with the Glock OEM Striker, keep it in there. It's going to make the gun run so much functionally better.
You start adding and changing all those different parameters and you're going to have, it's just a lot to maintain. If you want to have fun and shoot consistently and reliably sub 3 lbs (pounds), keep the Striker, OEM striker in there and you'll love it. You won't have to tweak and this and that. Ah, why am I getting those, tearing your gun apart and all the other stuff that I know a lot of the other shooters out there have experienced, we know it's an issue. It's on the forums. Read about it all the time. Why am I having a failure of fire, light strikes and I am about 100% sure this system has remedied it. So check it out. And thanks for watching the video and I will hopefully see you at the range sometime. Take care.