Dialing in Johnny Custom Glocks Trigger Part 1 EDUCATIONAL ONLY
TRANSCRIPT | Video Link
Hey Everyone. This is Johnny, AKA Johnny Glocks from Johnny Custom Glock.
I know I answer most of your minutia questions and dialing in and tuning up and all that via telephone, Skype or Facetime, things of that nature. But what I want to do is a lot of, you know, these are in a lot of stores now and not the competition models, but the carry combat models, but they all basically work the same way. I also have a next generation models that are coming out with probably about five or six new modifications that I have never offered before just through R&D and basically really listening to what the shooters that use my triggers out there have to say, I’ve compiled a bunch of new information and decided to put out another group.
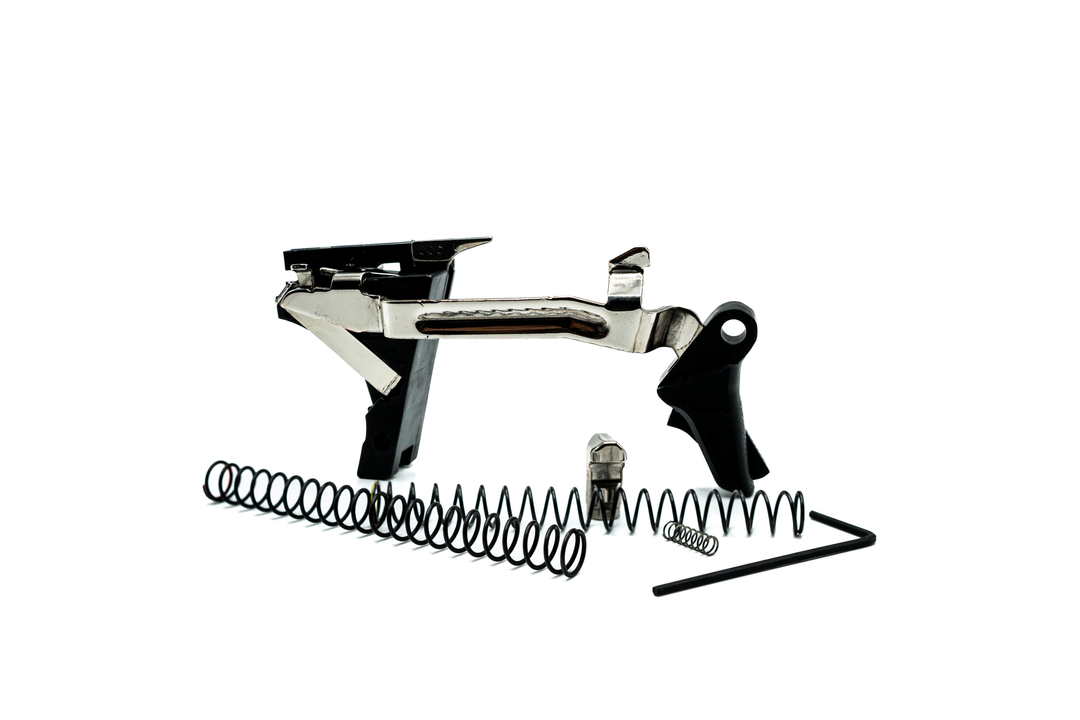
It is different geometry. It has some of the same geometry, different...these...you know, they're coming with a variety. Like here's a trigger right here that I'm putting in this for Gen 4. This one is specifically coming with a Glock OEM and a 3.5 connector as well because, as I’ve told you in other videos, you know, with this angle right here, this controls or like I say, everyone kind of mistakes I think crisp for quick, you know, the quicker that you know, the quicker the bar, the quicker the sear is being dropped, dropping the striker, that's what gives it that crisp feeling, that crisp sensation.
So basically, you know, if you have a 3.5 connector, it's relaxed, you know, it's more relaxed. So it is traveling back as it travels down. If you have a more aggressive angle, more of an obtuse angle like this and it is going to travel more down and less back, if you can follow that.
02:14
Because it's riding on this angle right here and rides in the connector like that. So whatever trajectory this angle, whatever it is, whatever the connector is determining is going to determine how quickly the sear comes off the striker or you could say vice versa.
So this particular trigger and this, like I said, this is the next generation triggers. They are coming with another set screw. What it's been, what I’ve noticed is a lot of shooters will say, Oh, there's a little bit of over-travel in this and there's definitely not over-travel with, I have done this double blind, you know, there's ways to test these things to see if that is indeed the case and it's not. And what most shooters feel is because if it's a polymer shoe, they're feeling some flex at the end, they're pulling, feeling some flex at the end of the pull, especially those that really ramp on the trigger shoe. And, if you're coming from an aluminum shoe or you want that aluminum shoe feeling, the only way to really take that out is to you know, put this new set screw in, which I'm including right now, which is right here.
So not only do you still have the set screw in the rear, and you can see this is my trigger because it's got a little bulge in there, I would never let anything like that come out of the shop. But basically this is your over stop and it's, your, controlling your reset as well. And then you have this, which does the same thing, but in between these two, you can dial them in just a little bit differently. But this gives you a very, very stiff trigger and feel, it's not going to have that flexy feel like you do. You know, with most of the Glocks.
04:10
In fact, you know, it's funny that they consider this the upgrade, but the serrated trigger has a lot more. It's a lot more robust as far as, you know, the feel at the end of it, it has a lot more material. That's. Since it's serrated like that it doesn't have as much give. So that's a really nice feeling trigger if you can get it right. If you know, put a set screw right here and pair it up with the serrated trigger.
Another thing that I’ve been doing is I actually pop out the trigger safety like this, voila. And I have a kind of proprietary way that I work on this leaf spring and that gives it so by the time I'm done, you know, the leaf spring is well extended. And what that's doing is it's giving you much better reset of the trigger safety, that trigger safety really you know, always, you know, I know you've felt over time some Glocks to get, they just lose that snap and the trigger safety coming back. And that's because this spring is wearing out, which is this leaf spring. So I do a couple things to it to really get it to stand out and I'm just going to check and see if I have, I think I have one or two in the vicinity.
So this is one that I’ve worked on and you can see this is quite a different angle than the stock one. If you can see, you can see that right away. And so basically if I really match them up, you can really see it. So that's going to give you, you know, when you're cutting a third of the trigger safety off to accommodate for pre-travel, you want to make dang sure this thing is purchasing against the frame. And that's what these new modified, that's what these, because safety is number one. That's what these new modification, this new modification is about. Actually, to make sure you have a very 100% solid purchase every time when this drops in.
06:31
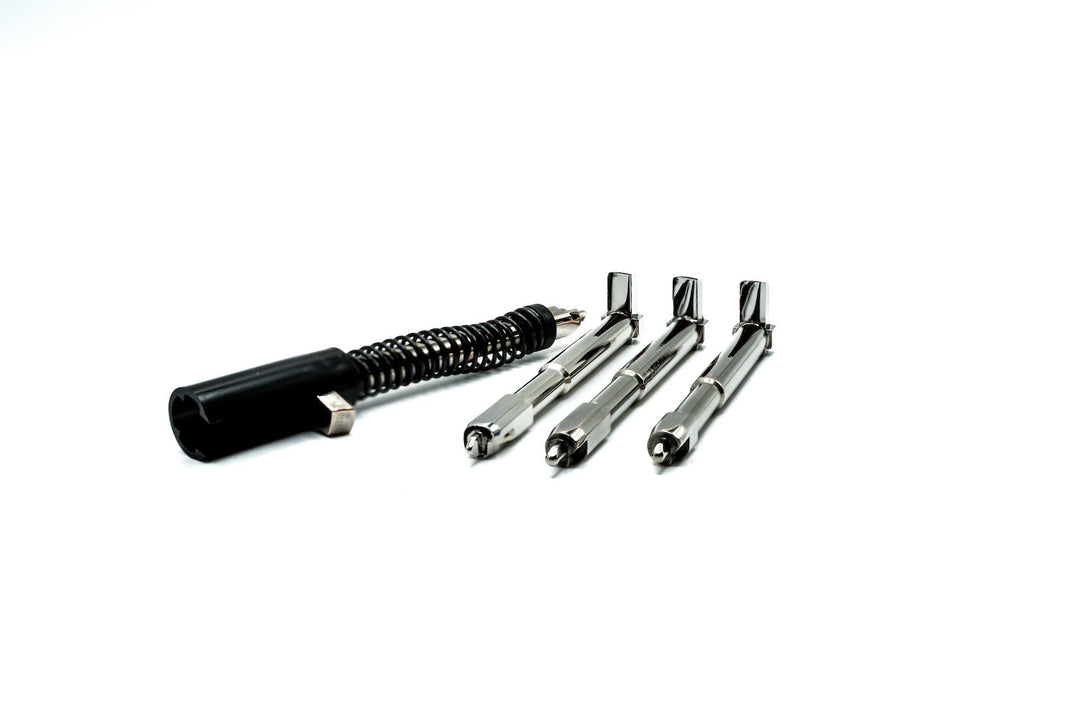
And so you know, I want to talk about dialing the system in. So you can have this always as a reference so you won't have to call if you just need to be reminded and things of like that nature, believe me, you can call anytime you want, but a lot of guys they'd just rather throw in a video, and I get it. So basically this is a 256-set screw with a, I mean a 0.035 Allen wrench head, socket set screw. That's what's going to go in here to turn this. I gave you the little keys with it.
But basically, I'm going to help you out here. If you're really looking to max the system out. It maxes out at about 3.25 millimeters. So that means the space that it takes. This space right here, this is what we're looking at, this space. I'm going to see if I can bring it up here a little bit closer for you. Okay. From this line, which is right here, that opening in the front to the back of the bar. I mean to the very beginning of the bar, right there. So you can see, I still have room to move on. I still didn't get it right man. Man these angles are so bizarre. So, okay, there we go. That's better. See, you can still see I have room to move and it's interesting because the trigger angles, I guess I should do it by this, but then you can't see the other, you know, you can't see the other part if I do it like this as well. But 3.25 is really maxing this out.
08:26
Another thing that I do as far as safety is concerned. So like I said, that's really what you're looking for about that much space right there. And that means when you pull the trigger bar up right there, you could even, you know, get an exacto knife and make a marker or something like that. Let me see if I have got my exacto knife.
I also have one of those fancy scrolls, you know, you can mark in plastic and stuff, so you can definitely see the little mark that I put on there. And now if we measure with the caliper, from right about, see how, when I back up like this and I come in, that's what I'm talking about. There's like kind of like a, you know, that's kind of like one of those lines right there that it could be here, it could be here, it could be here, right at the very, right where you kind of see the grit on the right there.
And as you can see, that's a perfect shot right there. So right there. We still haven't really maxed it out yet. We still got a little way. See there’s the mark. Little way I could go. Now with this trigger safety, and you can see, like I said, this is like one that's in kind of R&D. I can still cut off. It's a little bit of an angle right there. I can still cut off a little bit to straighten that out.
10:08
Do not shave this any more than when you get it because this is designed so the crossbars here sit on always, will always sit on the shelf. See off shelf, on the shelf if you're looking at it from this angle. Same thing if you're looking at it from this angle.
On the shelf is up here. On the shelf is right there, off the shelf is down here. So basically, I get it to where I'm really maxing it out. I'm right about right there. But trust me, you can take the gun like this and go bang, bang. Cause that's your drop set, and you want to hit it hard. And if you know, the sear drops off the striker lug face, it's not a safe gun. And some people will do that. The only way you can do that is by shaving this down a little bit more. And I'm telling you, you're on your own if you do that. You will never see it. And I build them all myself. So I know there's not a trigger that leaves this shop that is not calibrated for this to make this on the shelf. So the drop safety is 100% intact.
That's basically the pre-travel adjustment, you know, and then it could, if you take it all the way out, of course you're going to, you know, get stock pre-travel. But you know, you don't buy a competition trigger group for that unless you're, no never mind.
12:01
So basically let's talk about reset now. The reset in the next generations is controlled by two things. The first is going to be the set screw in the housing, which is right there. And if you can see the back of the crossbar is butting up against it. And these are finicky with the dang springs in here. It's so funny. A person said, I needed to tune up my camera work and I do. It's just so crazy because it's got this little monitor, you're trying to look in that monitor. It's almost half impossible to do. But I’ll give you the secret here. Right here if you would screw this in all the way. So it's right about there. It's still going to have room to drop, but you're going to have like a kind of a weird stall to the break because what it's kind of doing, it's kind of grabbing this 45 degree angle as it breaks and not really dropping the whole way down into the open window.
And you know, you're going to achieve that by, this is a 440-set screw in the back here and this is a 0.50 hex wrench. And you know, you're just going to turn this like this until you get it to sit about right there. Now that's too far. You know, basically you're getting it down in there, but as you can see it's still wanting to grab that angle. If you back it out, just a couple like a turn or so, now you can see it is flushly, maybe a little bit more. It is really flushly sitting down in that area with a little bit of space in front of, that's going to give you the break that it was intended to have as well as max out the reset. It's going to completely, you know, there will be no over-travel to this trigger and also you have to check over here for the reset because now what you're looking at is, this is the way the trigger resets. That's what you're hearing. That's the palpable sound. That's the audio sound right there, this.
14:27
So with a competition group, I am really, really pushing this threshold because I trust that you guys know how to do a lot of your, you're not afraid, you know, of a finicky reset at first that you might have to, you know, when I talk to you and say take it out half a turn and it's going to be right as rain. For the competition groups, I always have them tune them the opposite way, make them tighter because you know, if it's usually your first trigger. You know, you don't want a finicky reset. You're like, “Oh, you know, I got this trigger, you know, this trigger from Johnny Glock and it wouldn't reset.” You don't want that for a combat trigger. So I figured, like, the thinking was to do it opposite. For the competition guys, I have you dial it out of finicky, into reliability, and for the carry combat model, I have them dial out of reliability into maybe a little finickiness just to make sure, you know, people's sort of sleeping mind is being taken care of.
You know you want to sit there and think, oh this is gun's not going to go off in a self-defense situation. But right here, this is really, the gun will never fail you as far as resets concern and this is going to be another one of those hard angles. The gun is never going to fail you as far as resets concerned if you match up okay, right there. If you match up the end of this bar, the beak of the bar to the face, the space of this face right here. If you're under it like this and just kind of hanging on, that might get a little finicky. You might get away with it, you might not. You know the set screws really don’t back out too much, but right about there you're really, you know, that's kind of how I run my guns and if it's okay in the range and in competition, you know, I would never carry a gun that was pushed that far.
16:32
But you know, if you're way up here and now this is over top of the connector. Meaning up there, past it, like that, that's going to be a really long reset. So I hope you understand what I'm saying. So from here, from right here, short reset from way up here, long reset. And that is being controlled by this set screw right here. And like I said, this is not, this is my trigger that I'm messing around with right now. You will never see one of these bulges on your group. Back it out like that. Cause that's where it was. And then like I said, with the two, the Glock OEM, some people were more like, I have these conversations with you because you know, some people are more interested in a clean break than a reset because they are just slapping that trigger. Some people really want the quickest, shortest, most aggressive reset you can get. You will never get that with the Glock part with a Glock connector, even if it's a 3.5 connector.
From my research and I’ve done a heck of a lot, this Lone Wolf just because the way it's designed with the shortness of this face, gives you that 5/64th reset every time when you dial it in correctly and with reliability, that's the main thing with the reliability.
Those are basically the two, you know, ways you dial this trigger in. Reset and over-travel back here in the housing. This way. And then pre-travel in the shoe. And as you can see this, I grind this down to right here. So it's nice and flush for you. You know, and like I said, you can see, you know, this is just my trigger. I'm messing around with. Basically that'll all be completely beautifully sheen by the time it comes to you. So let's pop this in and let's see what we have here.
As you armorers know the first pin always goes in first. I like to come from the back because that way you don't have to go through so many, we don't have to go through so many clicks with the you know how they have the little indentations in the trigger pin there.
And then this would go in the back. Sometimes my thumb just gets so beat, I have to cheat a little bit and get my little wuss hammer out and put the slide back on. And so you can see we're still, right here is a telltale thing too. If you can look at the space in between right here. Let me get a good shot so you can see it. The space back here, there's still space in between that I can soak up with the pre-travel. I'm going to put this white thing behind it so you can see exactly what I'm talking about.
20:23
Oh man. There we go. Okay. So see how there's still space back there, that's about, maybe a half a turn to get that out. And that's going to get you, now it's going to take, you know, this much more pre-travel out. And that translates to a lot by the time you get up to the bar, you know, by the time you get to you know, like I said, it's 100% functioning right there. And there was some over-travel to that because I did not have it butted the whole way against there. You can definitely see there was some movement after that.
Not the fastest best reset in the world because it's a Glock, but it is a very nice, awesome quick break, you know, bang, right off there. Nice tactical break. So those are just some, like I said, I just want to make this video, so you saw how to dial this thing in. But I am available for phone calls anytime, you know, just call me, I’ll get back with you within 24 hours. But these are always the kind of questions I get, you know, how do I really get the max out of it? And you know, basically what we're seeing here with Gen 4’s is the real culprit with a lot of these, cause I’ve had several people call and say, “Hey, this isn't pulling the standard you know, back here on your literature you have at these average out like a, you know, with a glass wall break at 2.2 pounds with a 4.0 pound spring.”
22:08
See I have all this stuff written down for you to give you averages and all that stuff and talks about all the stuff that I just went through with you here. It comes in the trigger. It comes with the package with the spring kit. But basically, you know, a lot of the culprits with these Gen 4’s is because, you know, these days they're cheap and how it's a production gun. I feel they're not doing the best job with, the Glock is not doing the best job with their you know, with their strikers.
There's definitely, you know, you can always see some lines and mars on you know, this part of the striker right here. Ah, this camera. Okay.
You can see a little bit there. So that's mildly polished, but you can see right there, there's a cut in it, and that's from the sear coming back and hitting it. And this is supposed to be a Rockwell hardness.